
Why wait for Halloween? In just about every area of the US there is a Comic Con going on somewhere. Comic Conventions have exploded over the last 10 years. Not only a place to buy comic books, Comic Cons always have special guests, costume contests, and other fun activities for the whole family. Maddie's first Comic Con was very small. It was a one day event in our home town. Small as it might have been, it didn't stop 4,000 people from lining up to attend, a good 20% in costume. The entry fee was reasonable for adults and free for kids 12 and under.
There are larger Comic Cons in San Diego, Philadelphia, New York, and Las Vegas. My dream is to take Maddie to one of those (with guests like Nathan Fillion and the cast of The Avengers) but I'm not ready to mortgage the house to get there, pay for the entire weekend gold passes, have a place to stay, and eat a meal or two a day. So...Allentown Comic Con it was.
Costumes
Costumes are absolutely not required for a Con, but why not? Adults sometimes get a few dollars off their tickets and it's fun for just one day to pretend you are a superhero. Watching sci-fi shows, superhero flicks, reading comics book all have something in common: creativity and imagination. When children are exposed to fantasy they learn creativity. Their creativity manifests itself in many forms from writing and drawing to mathematics and science. The creative mind sees a problem or an idea and thinks of the many, many ways it can be solved. They see options and solutions. Creative people make the world go around. Creativity makes our life better.
For Maddie's first Comic Con we made a Dalek costume for her. A Dalek is a villain from the Dr. Who world. Here's a little tutorial for making a Dalek dress. Whenever I make costumes (and I rarely ever use store bought patterns) it's a lot of trial and error and creativity. This can work for any costume you want. If you are more comfortable with patterns don't be discouraged if you can't find exactly what you want. Use different parts of different patterns. Use the bodice from Pattern A and mix it with the skirt of Pattern B. Embellishments and accessories make the costume! Spare no expense for Wonder Woman's crown, Dr. Who's sonic screw driver, or Harry Potter's wand. You can make all of these things easily but never feel bad if you choose to purchase them.
*Note: The next section deals with a hand made costume. No one says you have to wear a handmade costume to a Con. Off the shelf are awesome as well. As long as you find the connection. The following tutorial is more to give you the skills you need to create any costume.
 *Note: Standard weapons needed for any costume construction is glue glue glue. Choose your glue wisely. Most of the "fabric" glue is woefully inadequate and hot glue doesn't work with a lot of different materials, often just peeling off. Over the years I have found two fabric glues strong enough to hold costumes together. Remember, your child (or you) will be wearing and moving in costume. The following glues are gold.
Here's what you'll need:
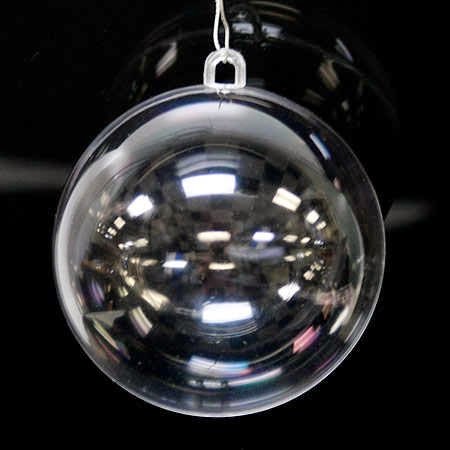
Christmas ornament halves
Silver and gold spray paint
six medium thickness dowels (and something to cut the dowels)
brown fabric (you'll have to make the measurements)
black silky fabric (about 2 yards)
brown (non silky) fabric (about a half yard)
glue as noted
elastic for the waist
a spool of medium thickness black ribbon
2 spools of thin brown ribbon that matches the brown fabric
gold fabric (1/2 yard)
2 medicine cups (clear)
one headband
one plunger (new please)
one paint roller with the handle cut off
Styrofoam tubing instead of black silky fabric if that is the way you will make the bumpers.
I broke this up into a bodice section and a skirt section. You will need to measure your child from waist to floor to figure out how many yards you need for the skirt. You will make six panels measuring 7 inches at the top and flaring to 13 inches at the bottom (1/2 seam allowance on each side when you sew the panels together). Since I used no pattern for this, the following is my pretty awful plans. Don't worry about how awful your plans are. Your plans will help you make the best costume you can.
.jpg)
The skirt is the first part of the dress and probably the most time consuming. The skirt will have six panels sewn together. Each panel should be about 7 inches on the top and open up evenly to about 13 inches on the bottom. Make sure you measure your wearer from the waist to about 3 inches off the floor (the bumper will take the other three inches). Sew all six panels together with a 1/2 seam allowance on each side. Hem the bottom all around and when you hem the top make a small casing along the top. You will be stringing elastic cord through it. Cut the cord so that it is a little tight on the waist. Fix a safety pin on one end of the elastic so you can thread it through the casing. Once the entire skirt is on the elastic stitch the elastic at each end.

The final step of the dress is the black bumpers.
THE HARD WAY (This is what I did before I thought about it). I chose a shiny black fabric to look like plastic. Measure each finished panel on the bottom. This is how long you are going to make each bumper. The bumpers are nothing more than tubes. You are going to make depth 3 inches so cut six pieces of black silky fabric the length of your panel by four inches for a one inch seam allowance. Sew along the edge and turn right side in when finished (leave the ends open). Stuff each tube with batting. Fold over the ends (make sure they are long enough to fit the panel edge) and sew the ends shut. Using the fabric glue glue the proper length dowel on the inside to give it stability.
THE EASY WAY (hindsight is 20/20, right?) Black foam. Cut to length of each panel and glue. You might need to secure the bend at each panel juncture. A piece of hard wire threaded through the entire foam becomes bendable at the joints.
 |
| Duh. |
The Dalek bumps were a bit of a challenge but I managed to figure out what to do. The bumps are smooth so half of a Styrofoam ball wouldn't cut it. I also toyed with making fabric puff balls and stuffing them but they weren't right either. Then lo and behold it came to me. Half of the make your own ornaments ornaments and gold spray paint. There are four bumps per panel meaning you need 12 balls (24 halves). These are 100 mm balls (about 4 inches).
When working with your Dalek bumps you need to make a solid back for them to adhere to the dress. Before you spray paint the halves you have to first gently break off the hooks (a little file or an easy break). Then place the ball on heavy weight paper. Glue the ball onto the paper by putting glue around the edges of the ball and pressing down. Let them dry. Then using an exact-o knife cut out the ball with the paper on the back. Spray paint the entire thing gold (you needn't paint the bottom), to eventually glue them on the dress. When you are ready to glue, have someone wear the skirt. It makes placement easier.

Once you have the Dalek bumps sorted out you are ready to glue them on. Have your model wear the dress so you can space out the bumps, four on each panel. Use the loctite glue shown earlier and spread the glue over the whole back. Press into place and hold for a few seconds.
*Note: Due to the weight of the dress you might need to make braces. This is easy. Use the heavy ribbon, hold the skirt to where you want it to fall on the floor, measure the lace from waist over the shoulder for each shoulder, cut, and sew onto the skirt.

The bodice is nothing more than two pieces of fabric in brown and black sewed together. It should fit around the chest easily. If you don't want to do buttons or fasteners, string on the corners to tie the bodice together works. Always give yourself a little extra to hem around the edges. Makes it look nicer on the outside.
 |
| Looks terrible on the inside but who cares. |
*Note: If you get the fabric-tac someplace you don't want it to go you have two options. One, wait until it dries a bit and gently scrape if off. I used edge of a knife (slowly slowly gently!). Two, use nail polish remover and gently go over it until the glue gums up and you can pull it off.

Finally...the accessories. No Dalek can live with out his sensors and his weapons. The sensors are nothing more than two larger medicine cups (off of NyQuil bottles) glued to a headband. I got this gold one at our local Dollar Store.

The Dalek weapons are a toiler plunger with it's handle painted silver (please make it new) and a paint roller with the handle cut off. This might take some doing. Find someone with a dremel or a metal coping saw. Be careful of sharp edges.
 |
| EXTERMINATE! |
And the results are in!


No comments:
Post a Comment